
Filters can be used to select a specific set of assets to be printed, copied, exported, etc.
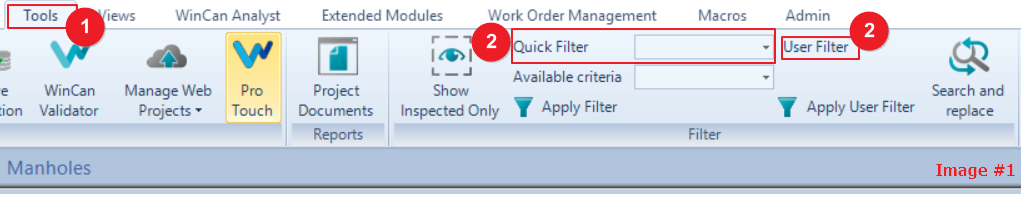
1. Click on the “Tools” tab (Image #1)
2. Next, select the ‘User Filter” or the drop-down bar for “Quick Filter” and choose what
fits your criteria (Image #1)
3. After selecting “User Filter”, you can now create a custom filter. Select “Paper +” Icon.
(Image #2)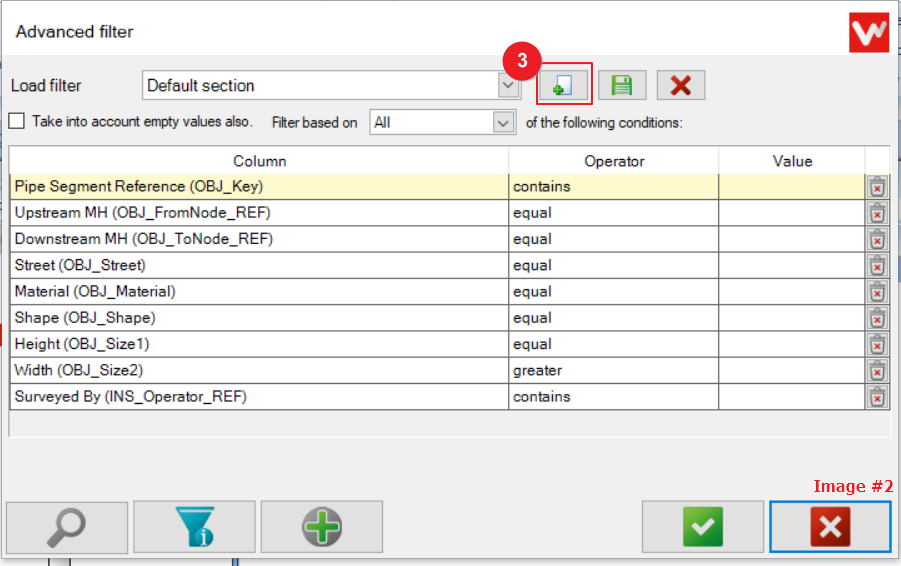
4. Then, it will prompt a new filter name. Name it anything that fits your use. (Date ETC…)
5. In the “Column” drop-down, choose what fits your criteria. If there are more than one
criteria required, select the “Green Plus Icon”. This allows you to add more than one to
be matched. Example: Date and Manhole (Image #3)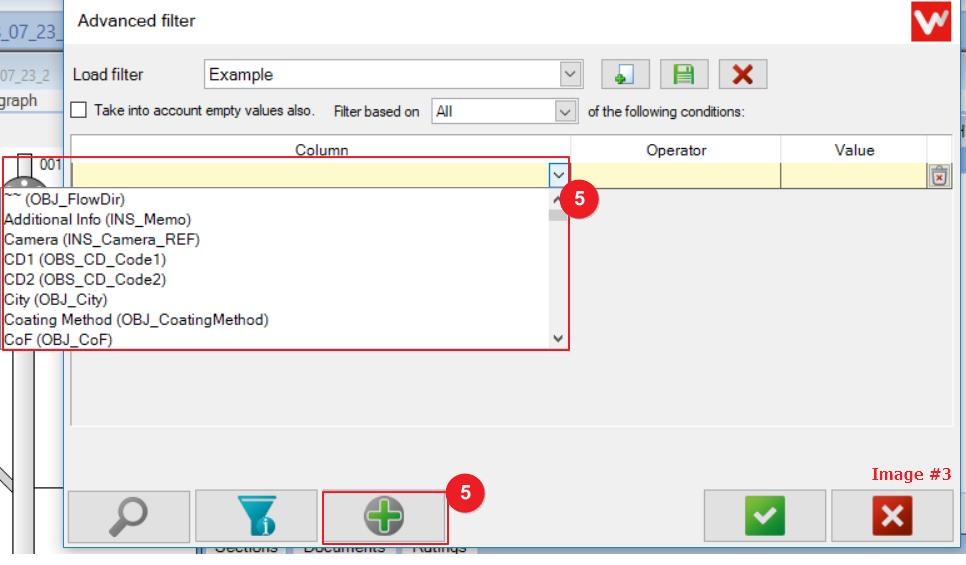
6. After choosing the criteria in “Column”, select in the "Operator" if you want to filter the
value greater, equal to less than desired. (Image #4)

7. By pressing the funnel tool, it will notify you how many sections fit the criteria you
filtered. (Image #5)
8. Then, you can select the “Green Check” to move forward and see your project become
filtered. (Image #5)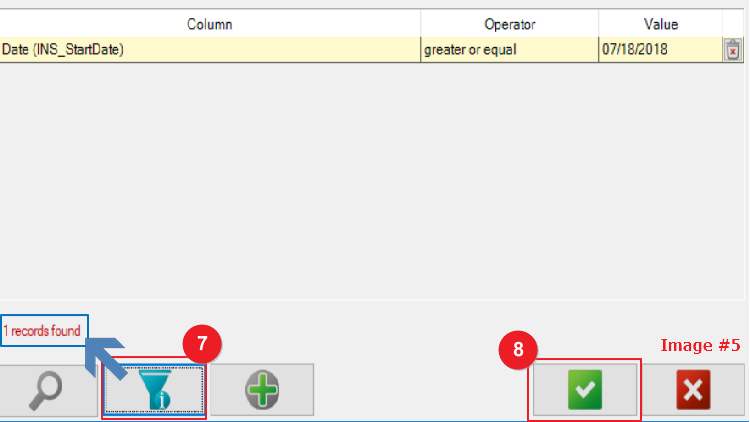
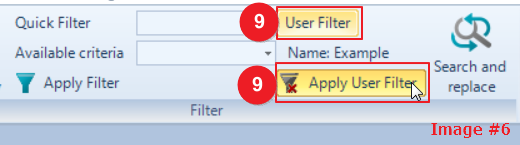
9. Now that the filters' created, your section will only display sections that fit the criteria
you entered. To take off the filter, click on the now yellow highlighted ‘Apply User
Filter”. This will take off the filter and show all the sections now. (Image #6)
Comments
0 comments
Please sign in to leave a comment.